PGo
PGo
In PGo’s active-development state, we do not provide stable releases. To run PGo, the best way is to clone the repository, and, on the master branch, run it via the sbt build tool:
$ sbt
> run [command-line arguments]
See the usage notes below for what arguments the program accepts.
Note: if you run it on one line, then you must quote the arguments, as in sbt run "[command-line arguments]".
Usage
The PGo tool’s help text reads:
PGo compiler
  -h, --help   Show help message

Subcommand: gogen
  -o, --out-file  <arg>
  -p, --package-name  <arg>
  -s, --spec-file  <arg>
  -h, --help                  Show help message

Subcommand: pcalgen
  -s, --spec-file  <arg>
  -h, --help               Show help message
It has two subcommands: gogen and pcalgen.
gogen
The gogen subcommand requests that PGo generate a Go file from an MPCal-containing TLA+ module.
Most customisation of this stage should be done by choosing specific parameters when calling the generated Go code,
so there are only a few options to consider.
--out-filespecifies the path to the Go output file, like-oin GCC.--spec-filespecifies the path to the TLA+ input file--package-nameallows customisation of the package name of the Go output file. This defaults to a sanitized version of the MPCal algorithm name.
pcalgen
The pcalgen subcommand requests that PGo rewrite its MPCal-containing TLA+ input file,
such that it contains a PlusCal translation of the MPCal algorithm.
The only option, --spec-file, is the path to the spec file, which will be rewritten.
To insert the PlusCal translation, PGo will look for comments like, give or take whitespace:
\* BEGIN PLUSCAL TRANSLATION
... any number of lines may go here
\* END PLUSCAL TRANSLATION
If it cannot find one of both of these comments in that order, it will give up with an error message describing the problem, and will not write any output.
How it works
PGo is a source to source compiler written in Scala. It compiles specifications written in an extension of PlusCal, called Modular PlusCal (see the Modular PlusCal page for more details), to Go programs.
How to build (for development)
PGo’s Scala code builds via an sbt project, with its dependencies managed
by Maven.
PGo additionally provides a runtime support library for its generated Go code, which lives in the distsys/
subfolder. This Go code is a standard Go module, which can be imported via the URL https://github.com/DistCompiler/pgo/distsys.
The main build script is the top-level build.sbt.
To build from terminal, run sbt in the root directory and use the standard commands provided by the sbt console.
These include run <command-line args> to (re-)compile and run PGo, and test to run all tests, including Go tests.
The sbt build can also be auto-imported by the IntelliJ Scala plugin, as well as likely any other IDE with Scala support.
PGo’s Scala code has managed dependencies on a small set of utility libraries:
- scallop for command-line argument parsing
- scala-parser-combinators for the TLA+/PCal/MPCal parser
- os-lib for simplified file and process manipulation (process manipulation is used during tests)
PGo’s test suites additionally depend on:
- the
goexecutable. The tests will attempt to find this, probably on the$PATHor equivalent, via the JVM’s default lookup process. - ScalaTest as test framework
- ScalaCheck for implementing fuzz tests
- java-diff-utils for generating diffs when tests compare big blocks of text
PGo’s Go runtime library depends on:
- immutable for efficient immutable implementations of lists and maps in the TLA+ data model. For example, creating a modified map with one different key-value pair should take constant time, rather than copy the entire existing structure.
- multierr for combining errors.
PGo is tested using OpenJDK 1.11 through 1.16, and Go 1.18. OpenJDK 1.11+ is needed because of standard API usage. Go >=1.18 is needed because of generics.
Example verification workflow
In this section, we’ll go over how to verify a load balancer. We’ll get PGo’s example load balancer specification, compile it to PlusCal using PGo, compile the resulting PlusCal to TLA+ using the TLA+ toolbox, and then verify some invariants and properties of the specification in the toolbox.
-
Download PGo’s example load balancer specification.
-
Compile the specification to PlusCal (output in the same file) using PGo with the following command, replacing the example paths with appropriate paths.
sbt run pcalgen --spec-file systems/loadbalancer/load_balancer.tla -
Open the load balancer specification in the TLA+ toolbox (by going to File > Open Spec > Add New Spec… > Browse…).
Add New Spec...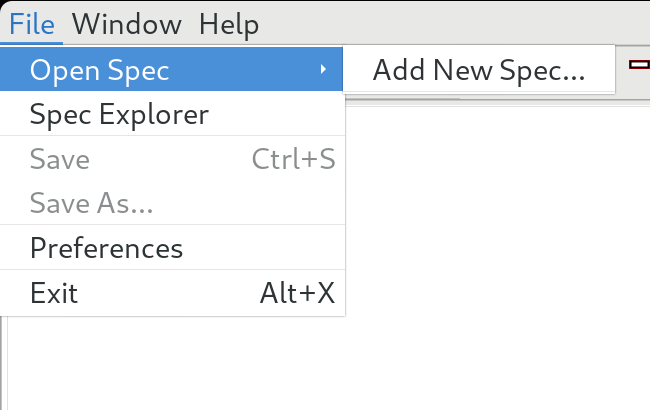 Browse...
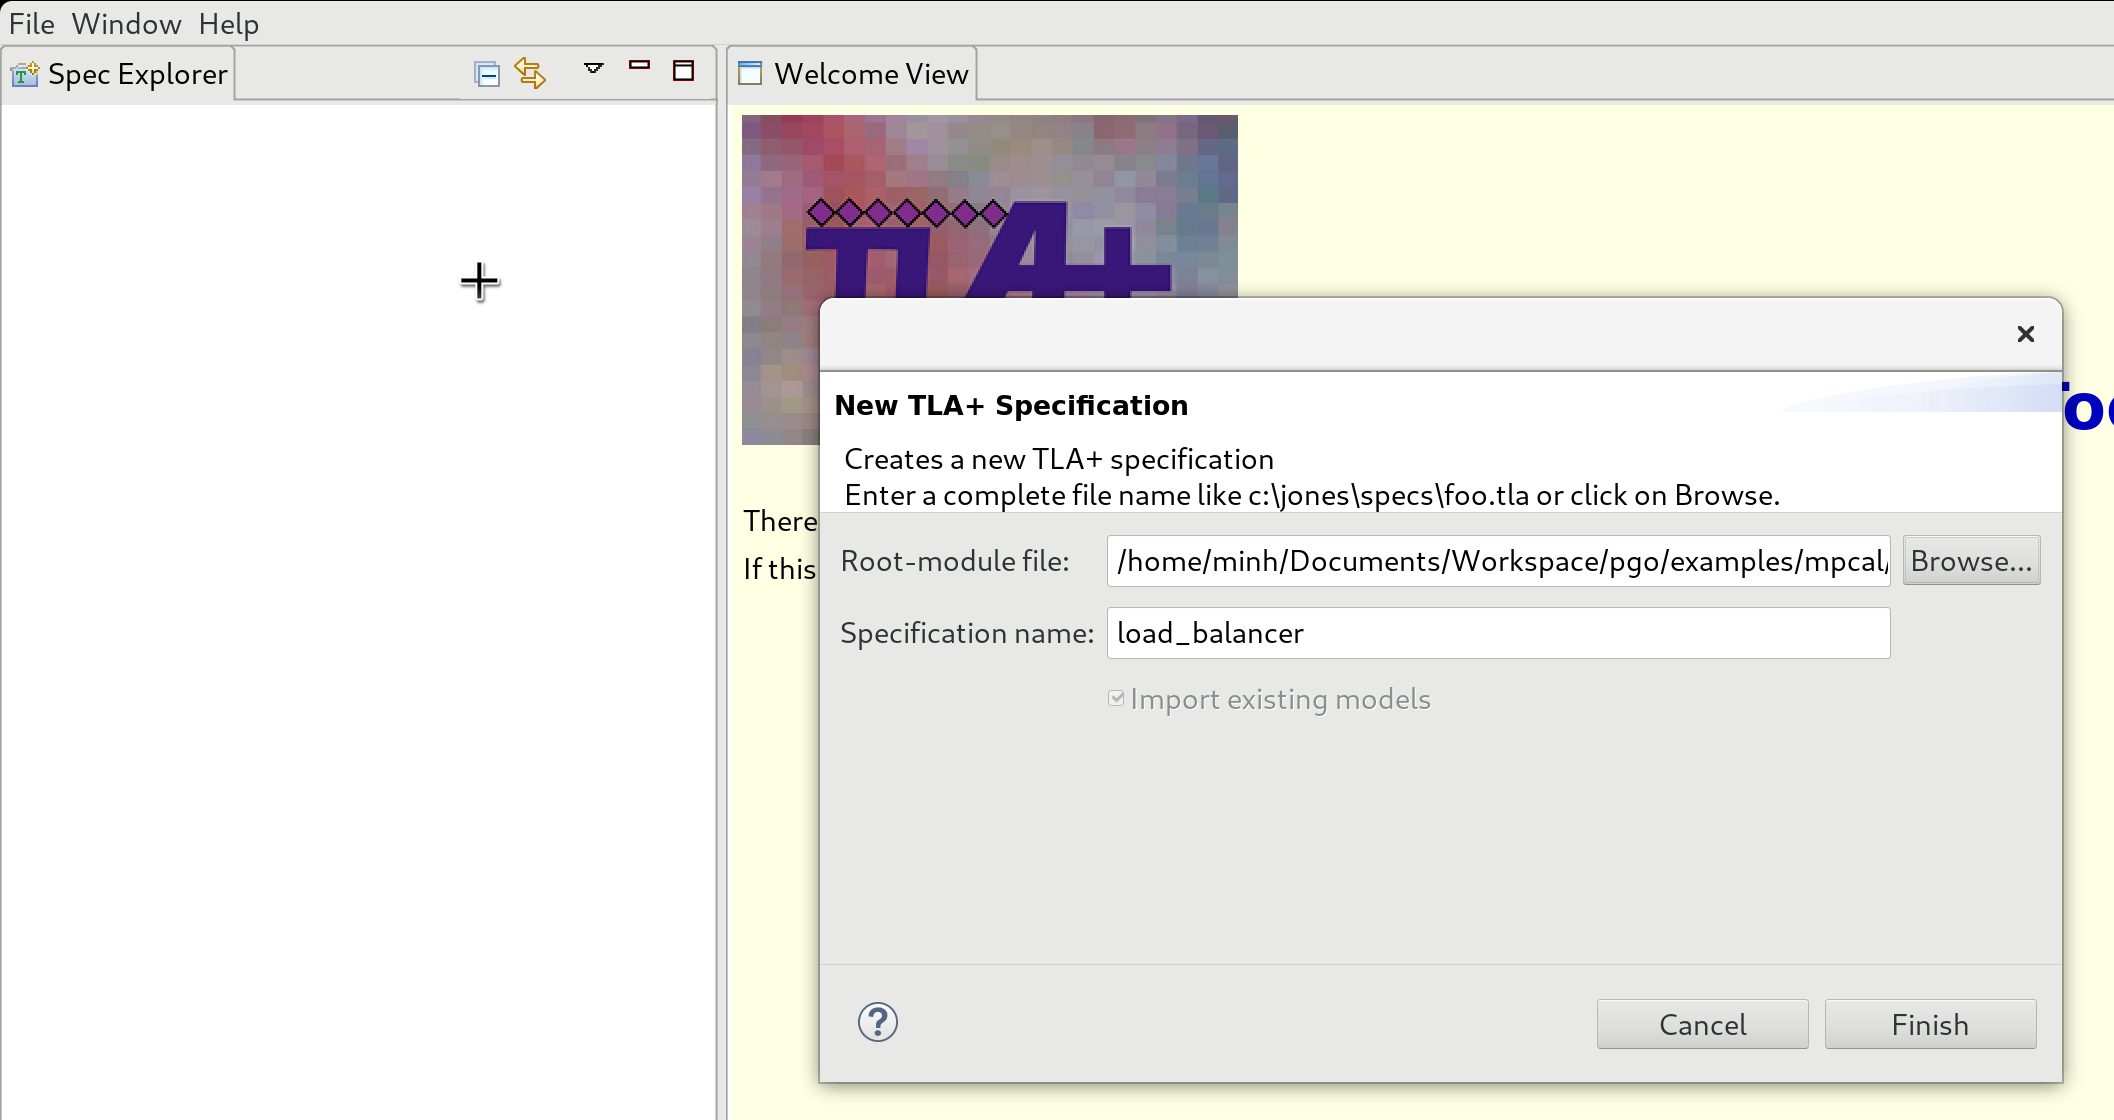
-
Press
Ctrl-tto compile PlusCal to TLA+ (output in the same file). -
On the left pane, right click on models, select New Models…, and name the new model. The created model is opened on the right pane.
New model...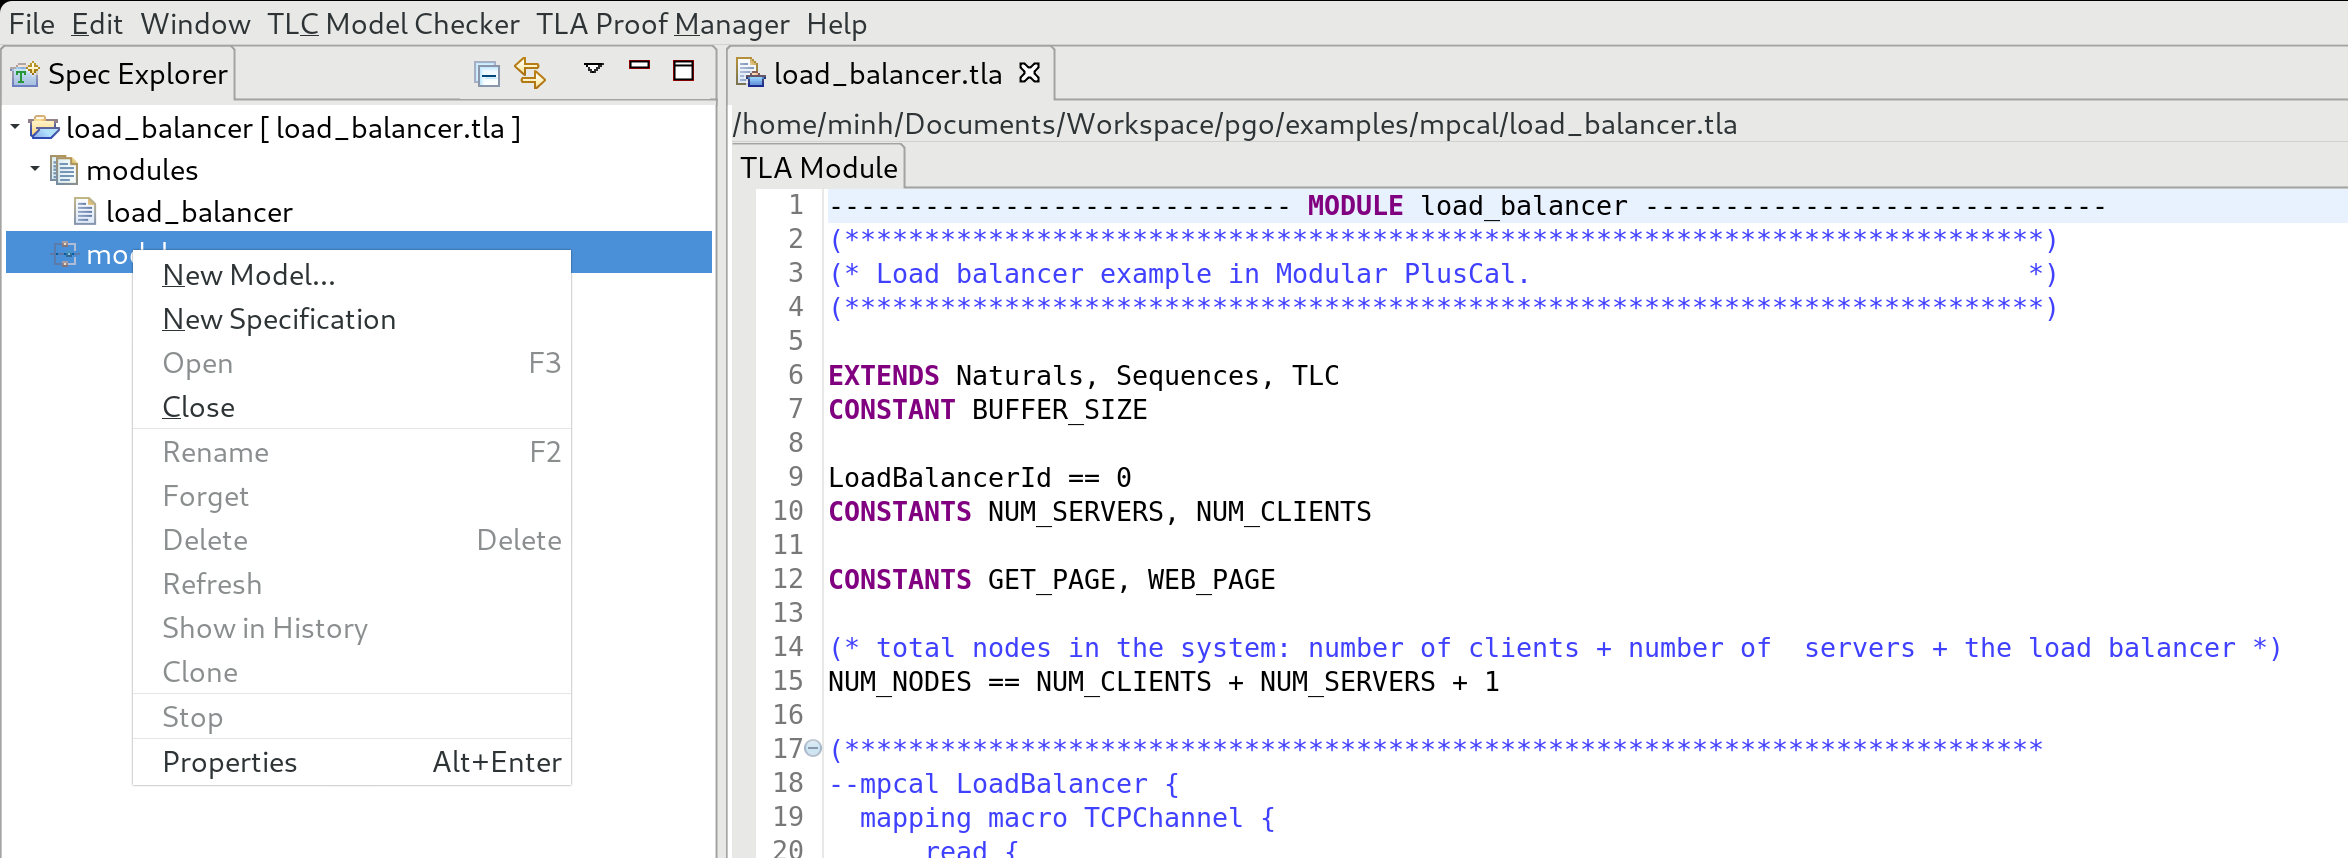 New model dialog...
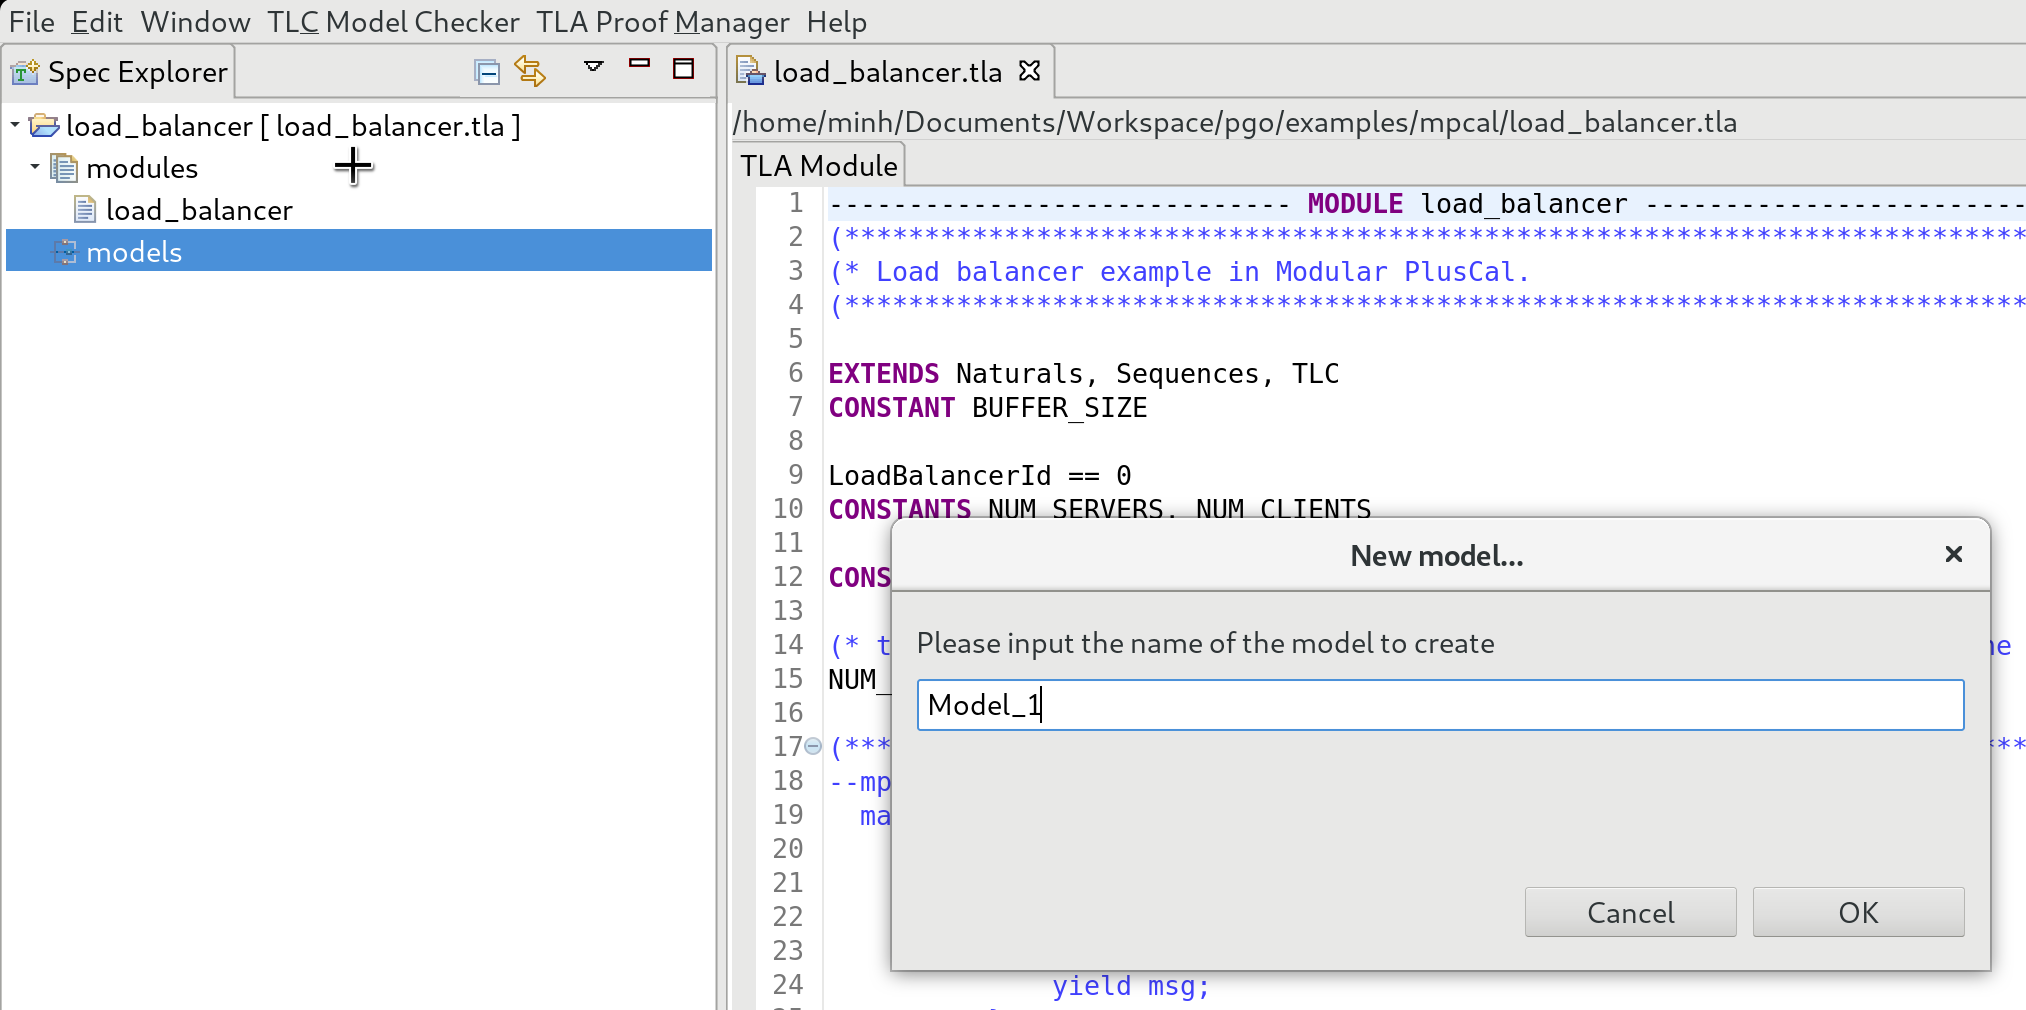
-
In “What is the model?” on the lower right side, double click on each item and fill in the following values.
Item Value GET_PAGE 1 NUM_CLIENTS 1 NUM_SERVERS 1 BUFFER_SIZE 1 WEB_PAGE 1 You can vary the values as you see fit.
Value filling...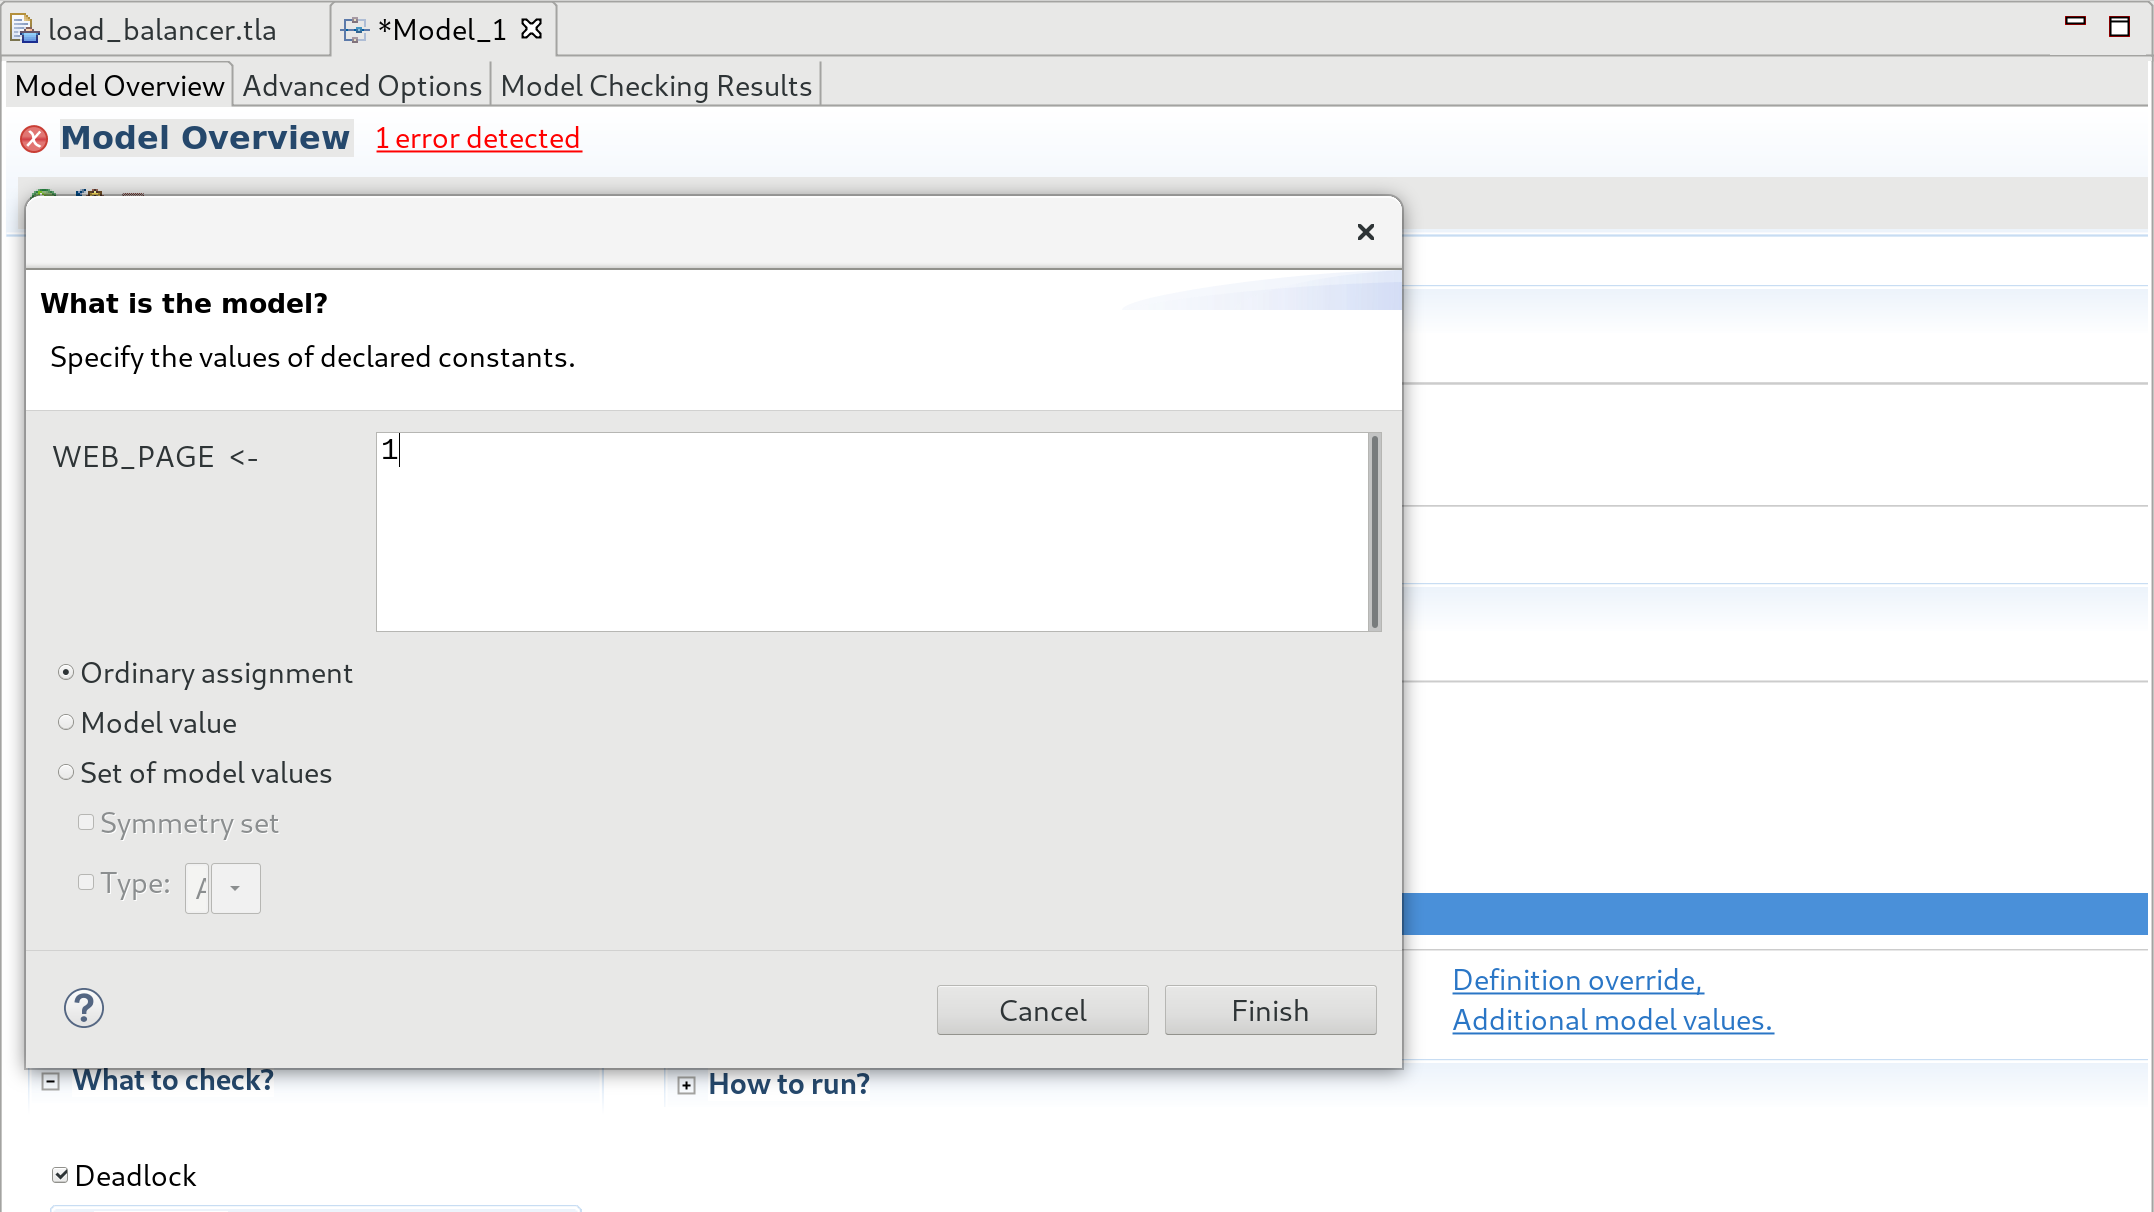 What is the model?
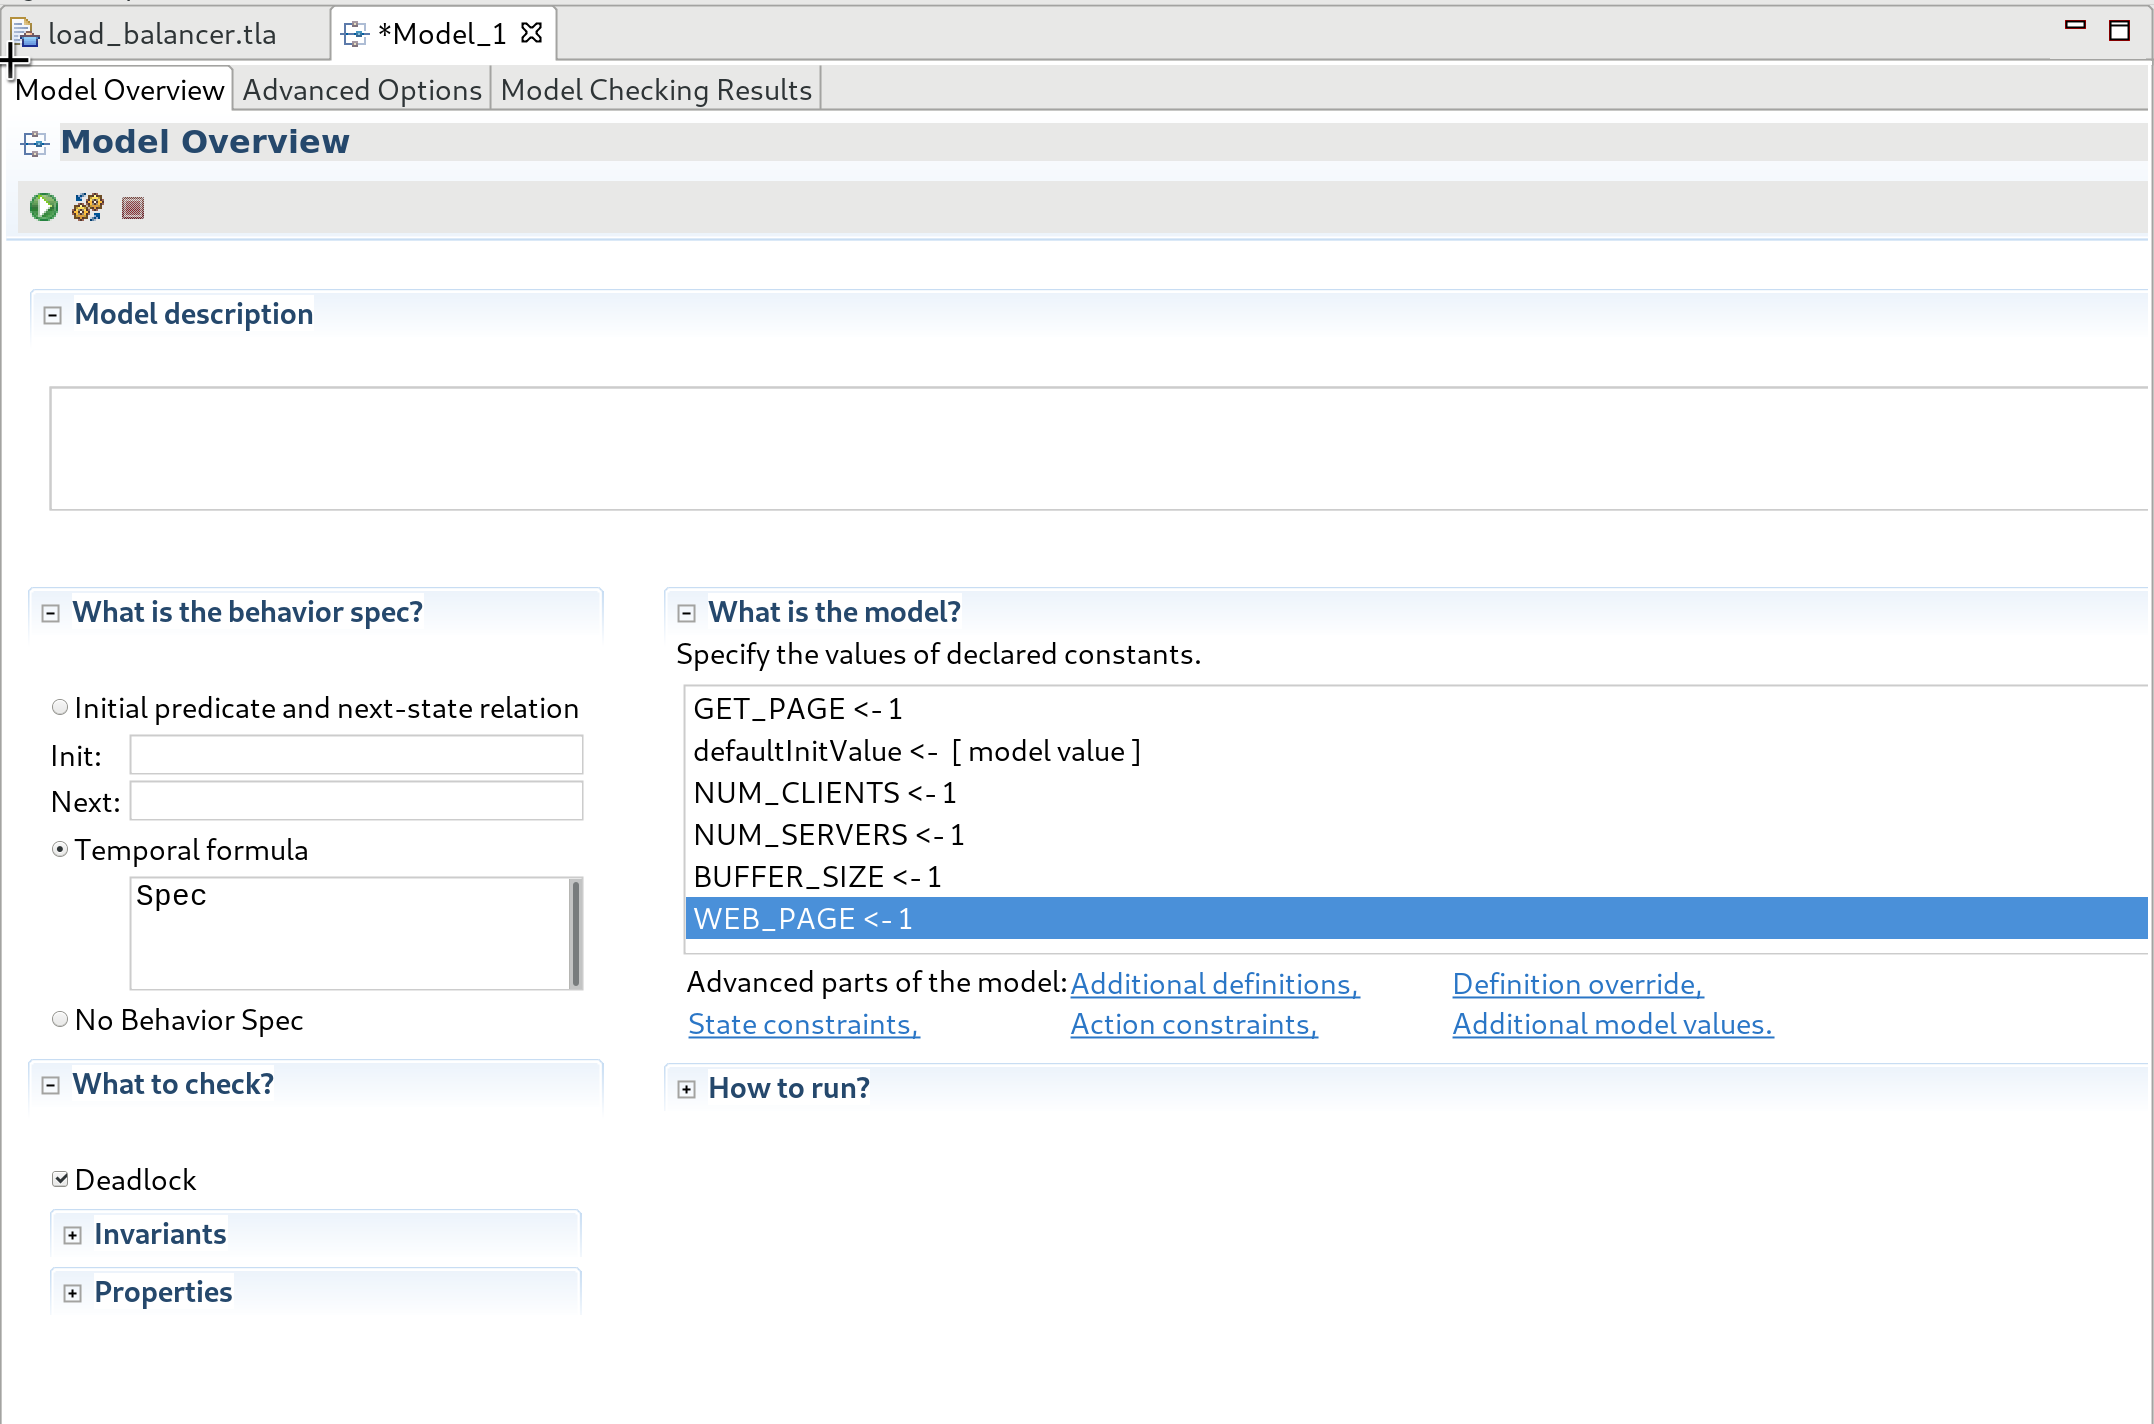
-
Scroll down and expand out Invariants and Properties on the lower left side.
What to check?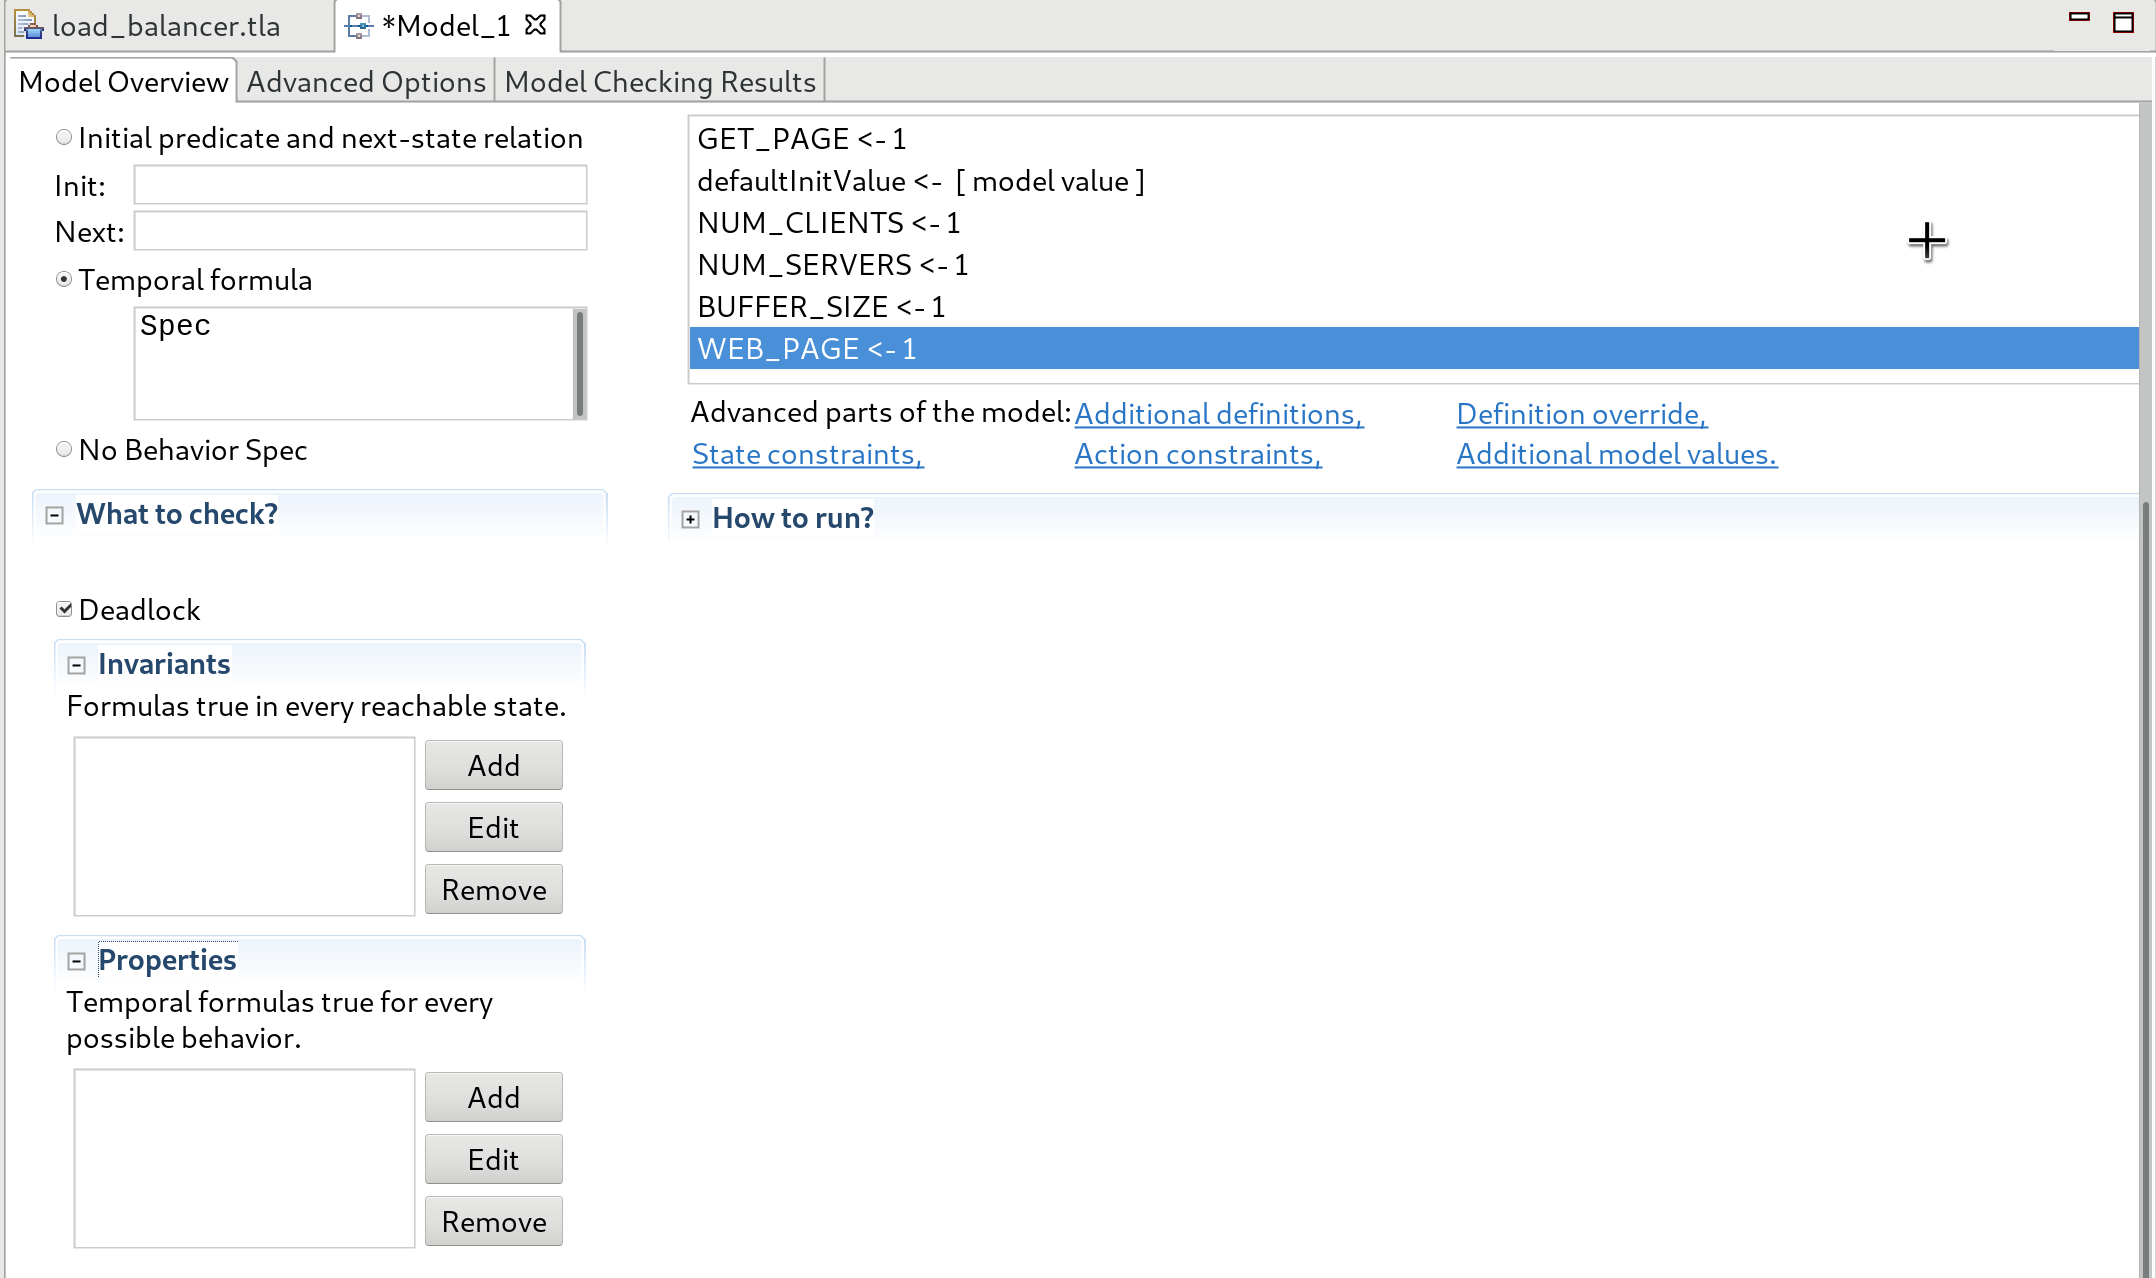
-
In Invariants, click Add, type in BuffersOk, and click Finish. BuffersOk (found on line 501) states that the buffer must not underflow nor overflow.
Invariants...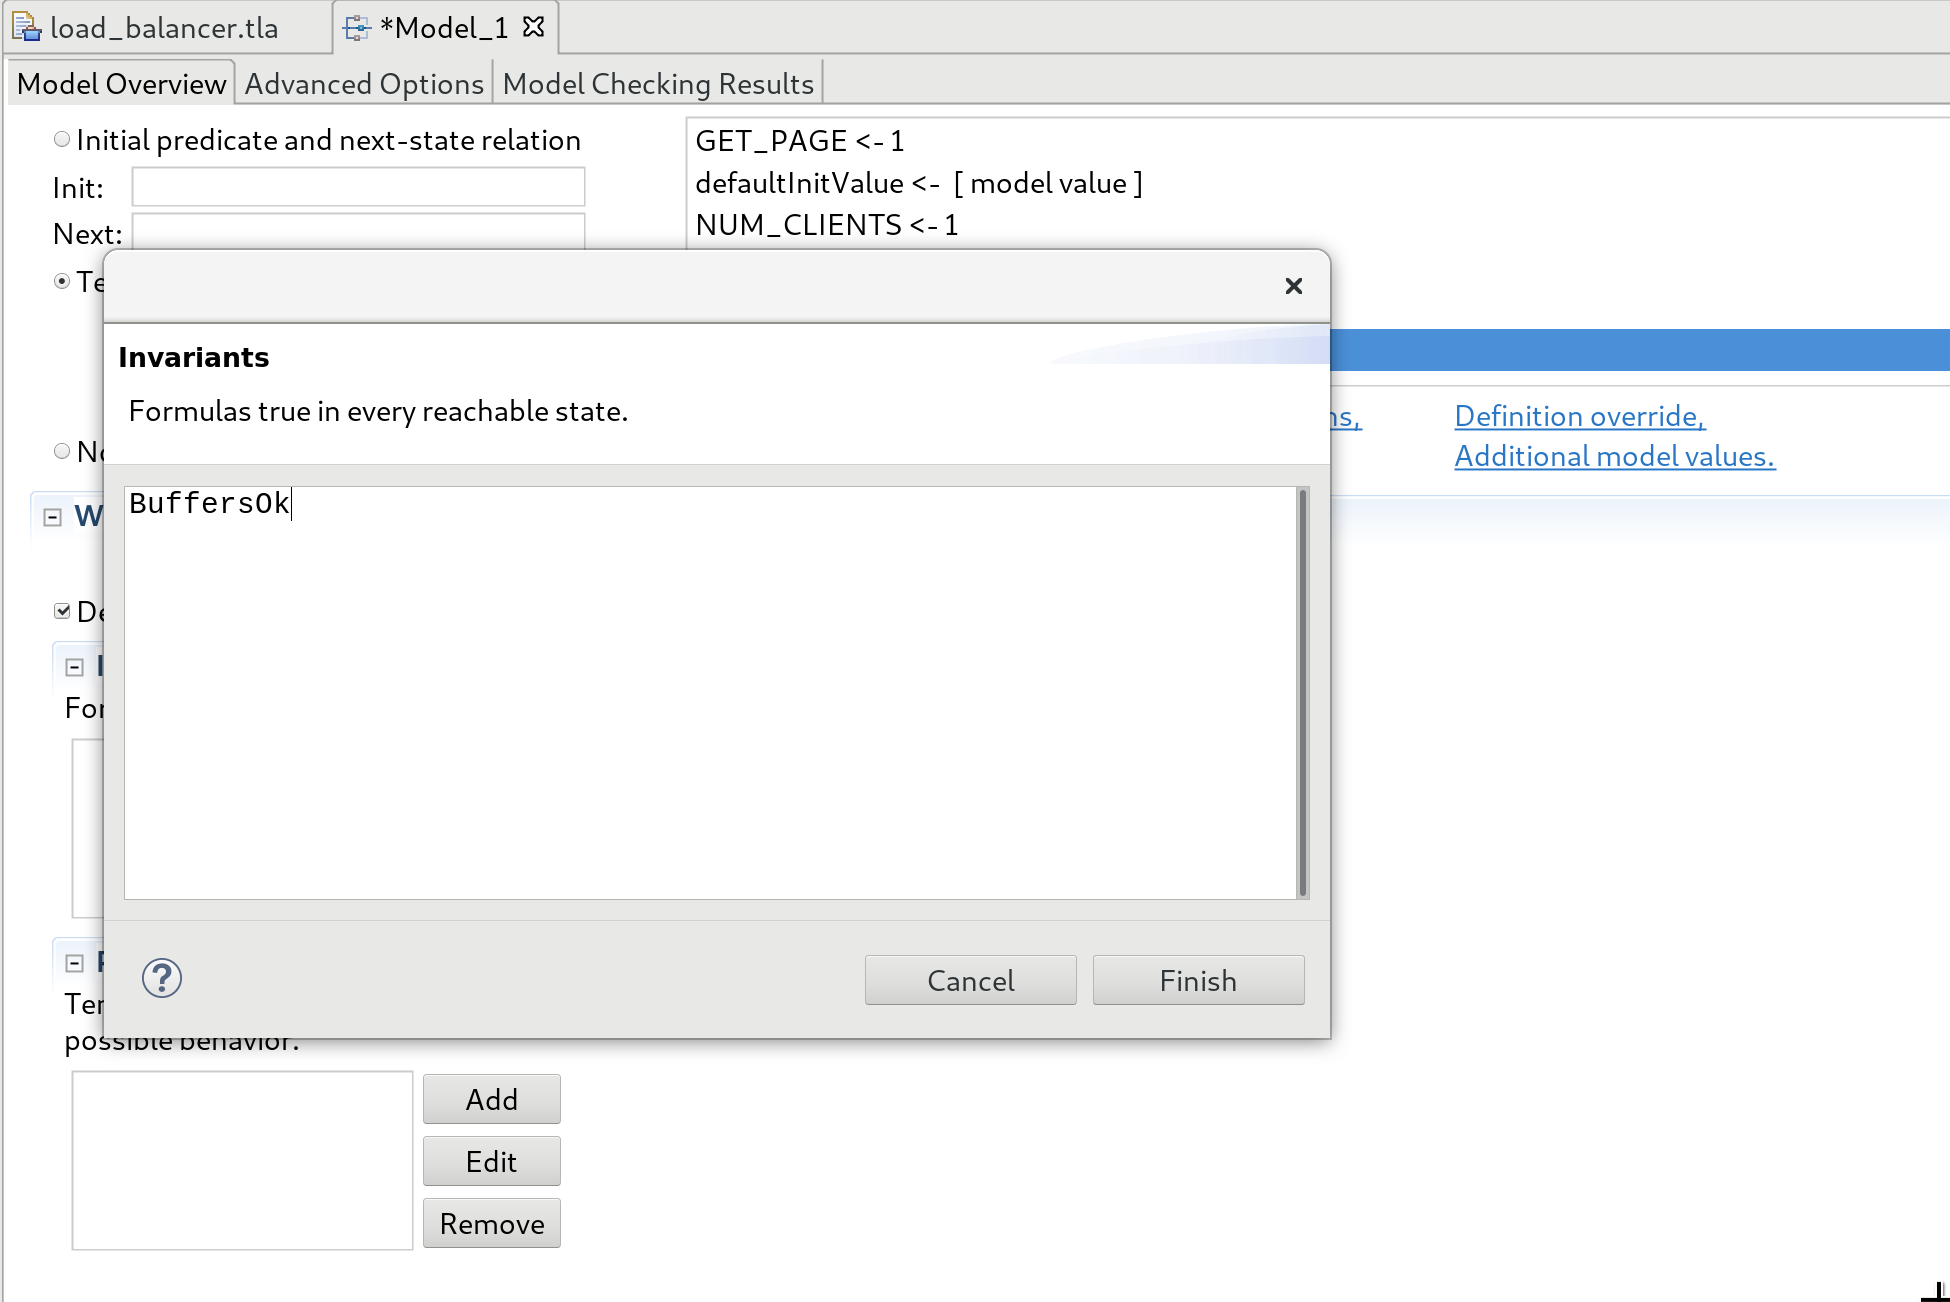
-
In Properties, click Add, type in ClientsOk, and click Finish. ClientsOk (found on line 515) states that the client requesting a web page eventually receives that web page.
Properties...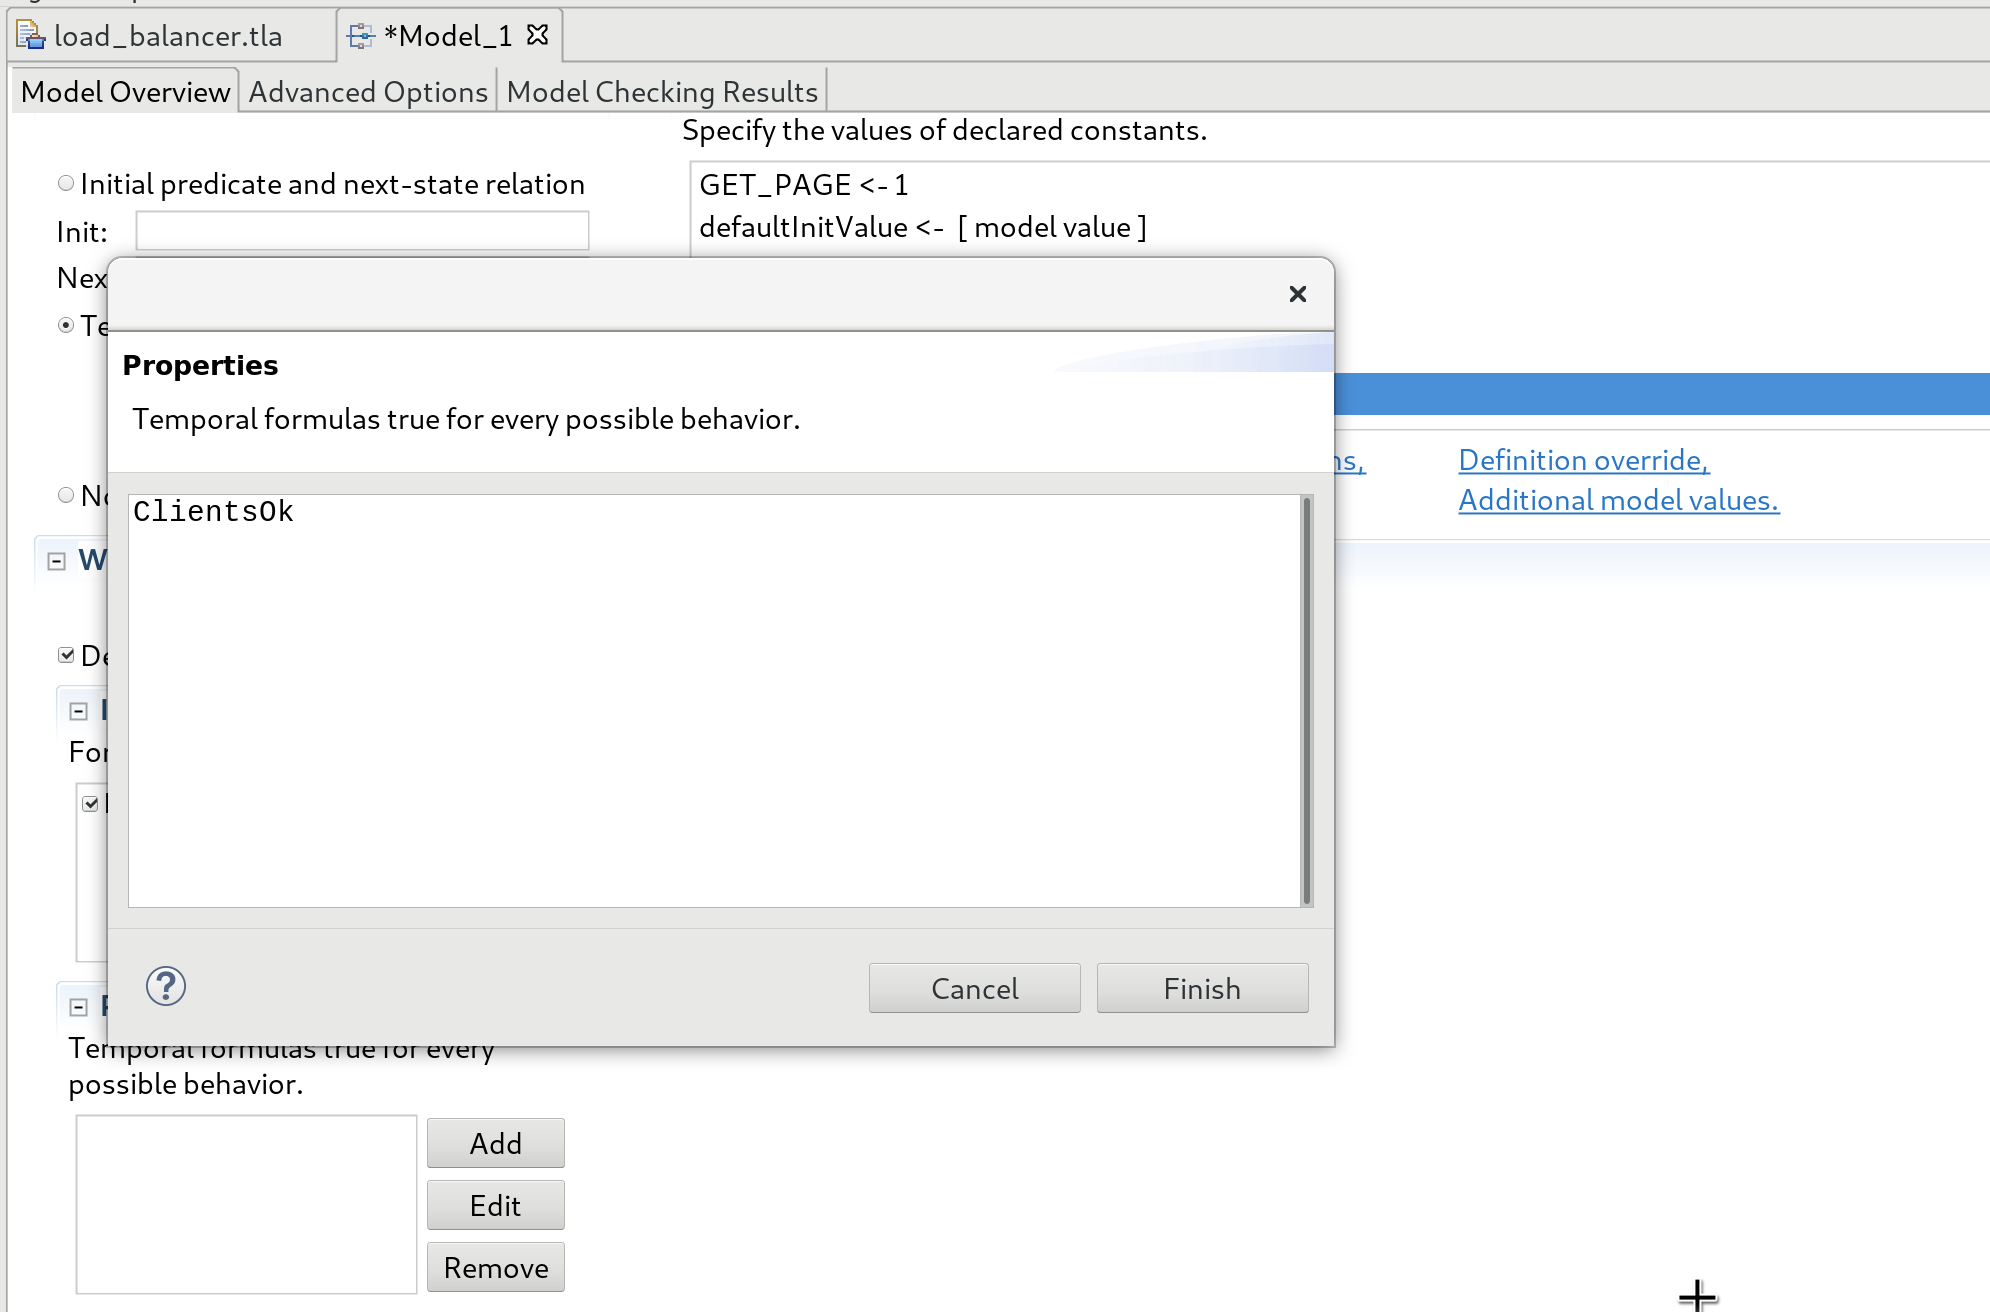
What to check? should now look like the following.
What to check?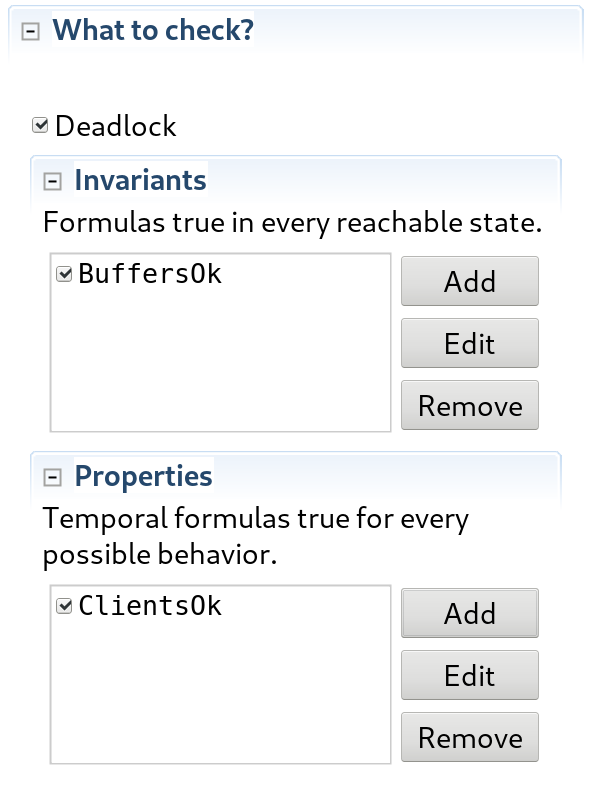
-
Click Run TLC on the model. (the green circle with a white triangle that looks like a play button)
Run TLC on the model...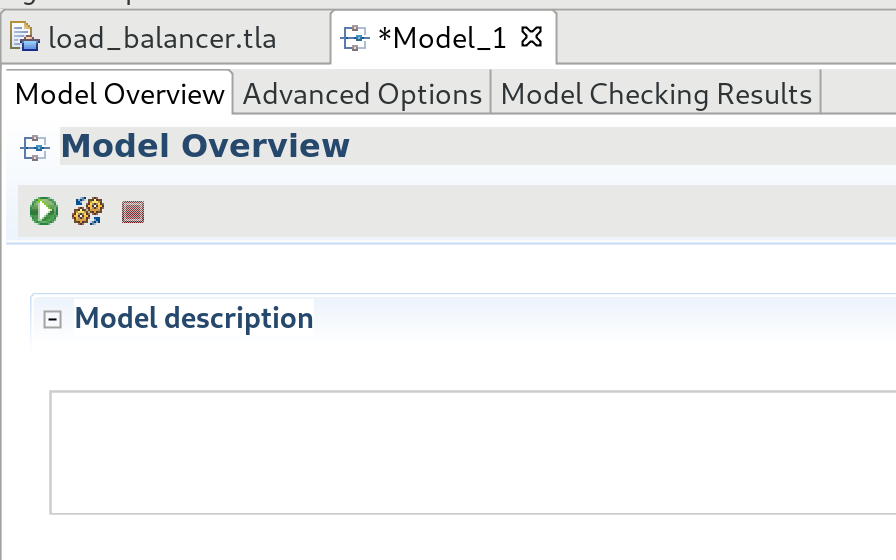
Below is an example output.
Results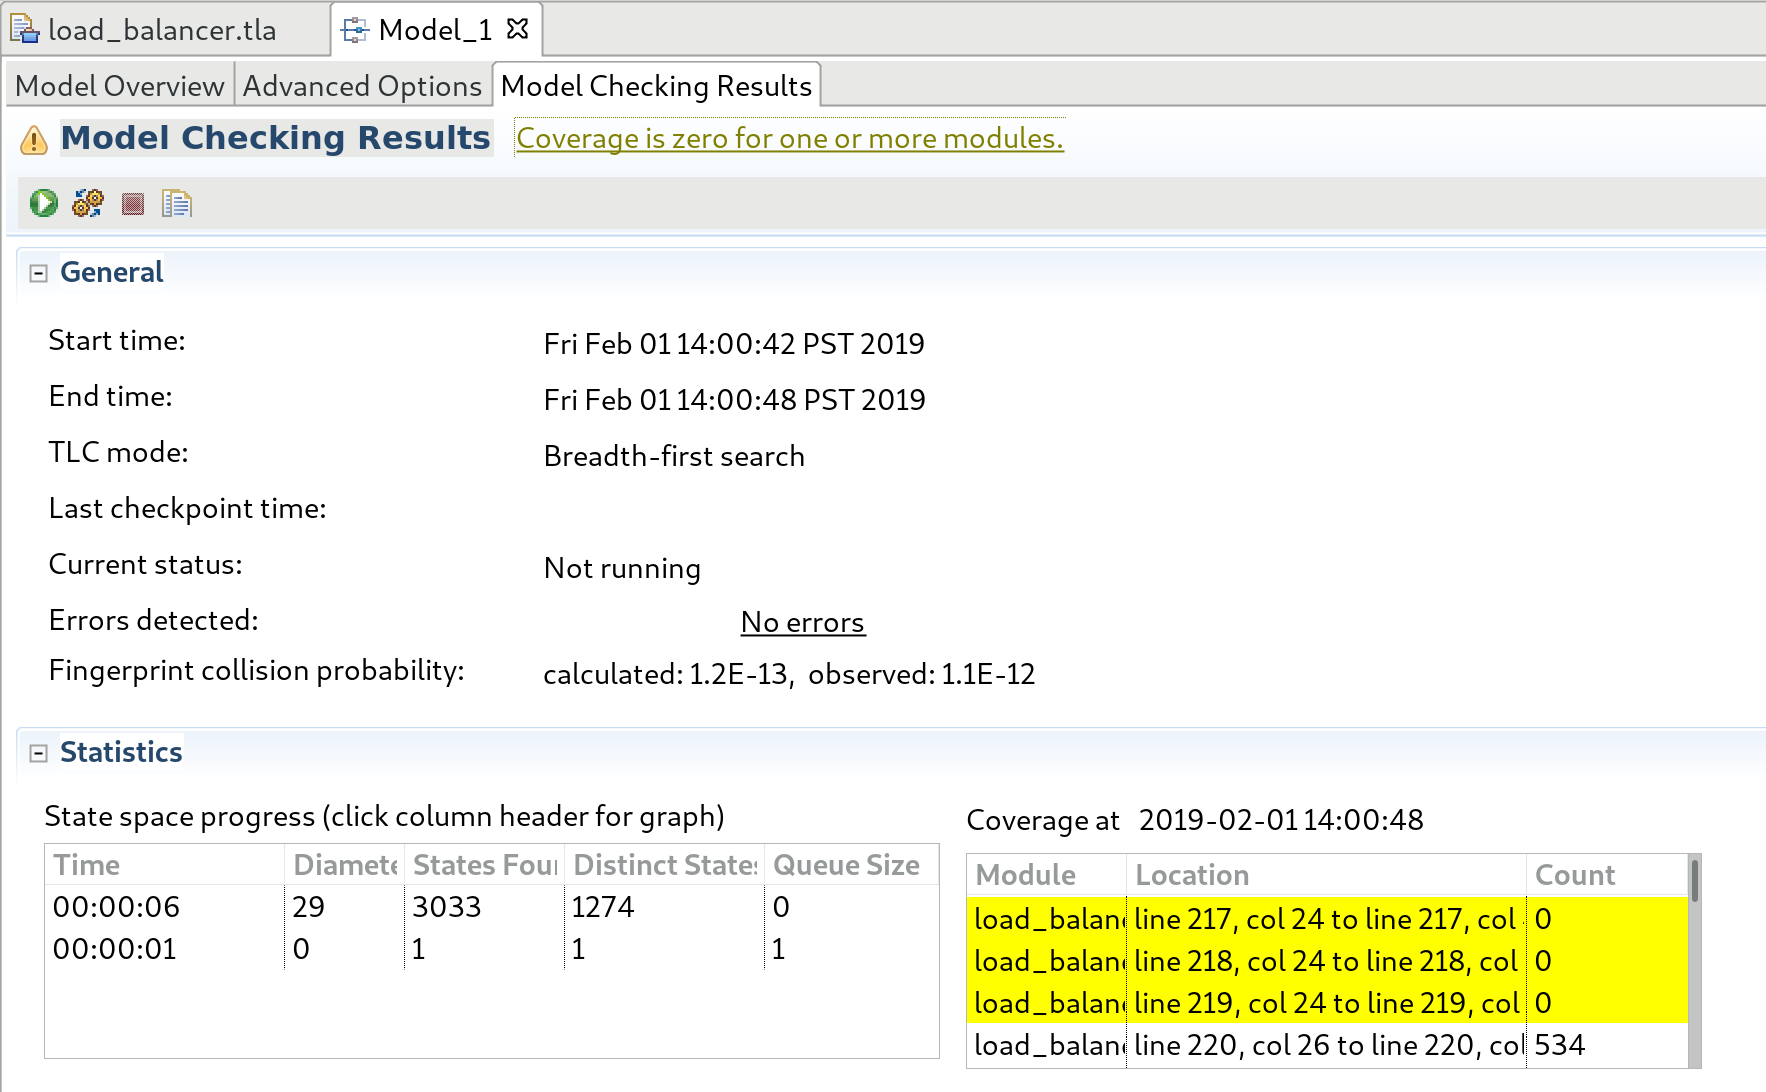
The output shows that TLC ran for 6 seconds in breath-first search mode. It found 3033 states, out of which 1274 states are distinct (visited states are not rechecked). The specification satisfies the invariant
BuffersOkand propertyClientsOkso TLC outputNo errors.
Example invariant violation
In this section, we’ll modify the example load balancer to see an example violation of desired invariant BuffersOk.
-
Open the load balancer specification in the TLA+ toolbox.
-
Comment out line 234, which instructs the client to wait until the buffer is not full before sending a message. Press
Ctrl-sto save.Where to comment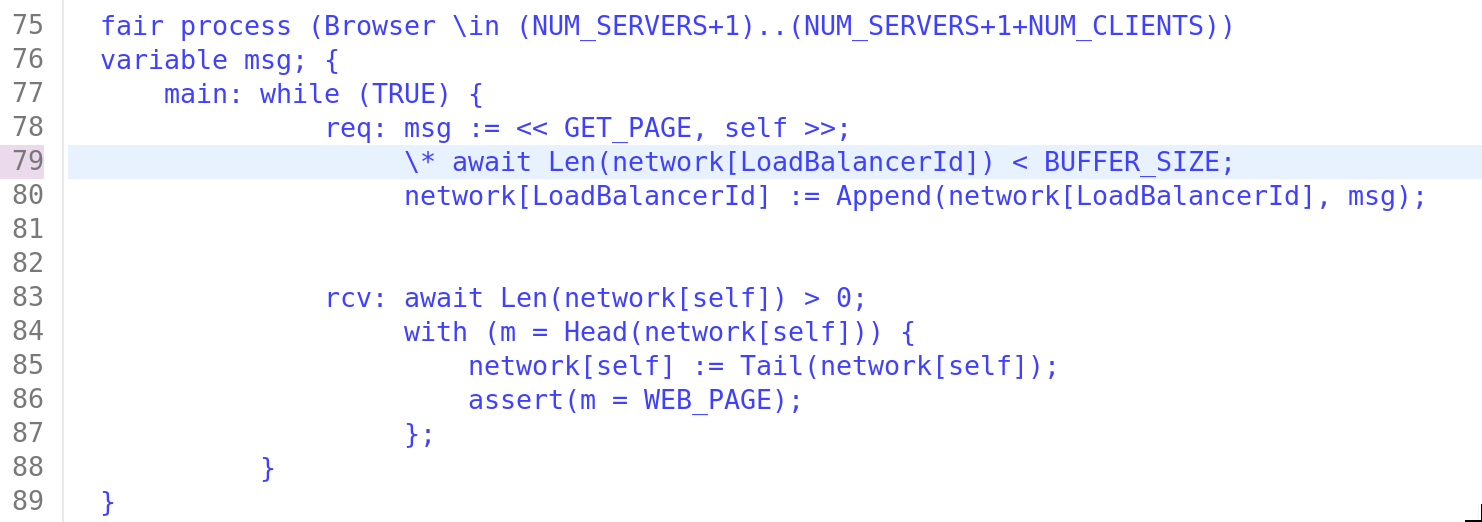
-
Recompile the file using PGo.
-
Reload the file when asked to do so in the toolbox.
Reload...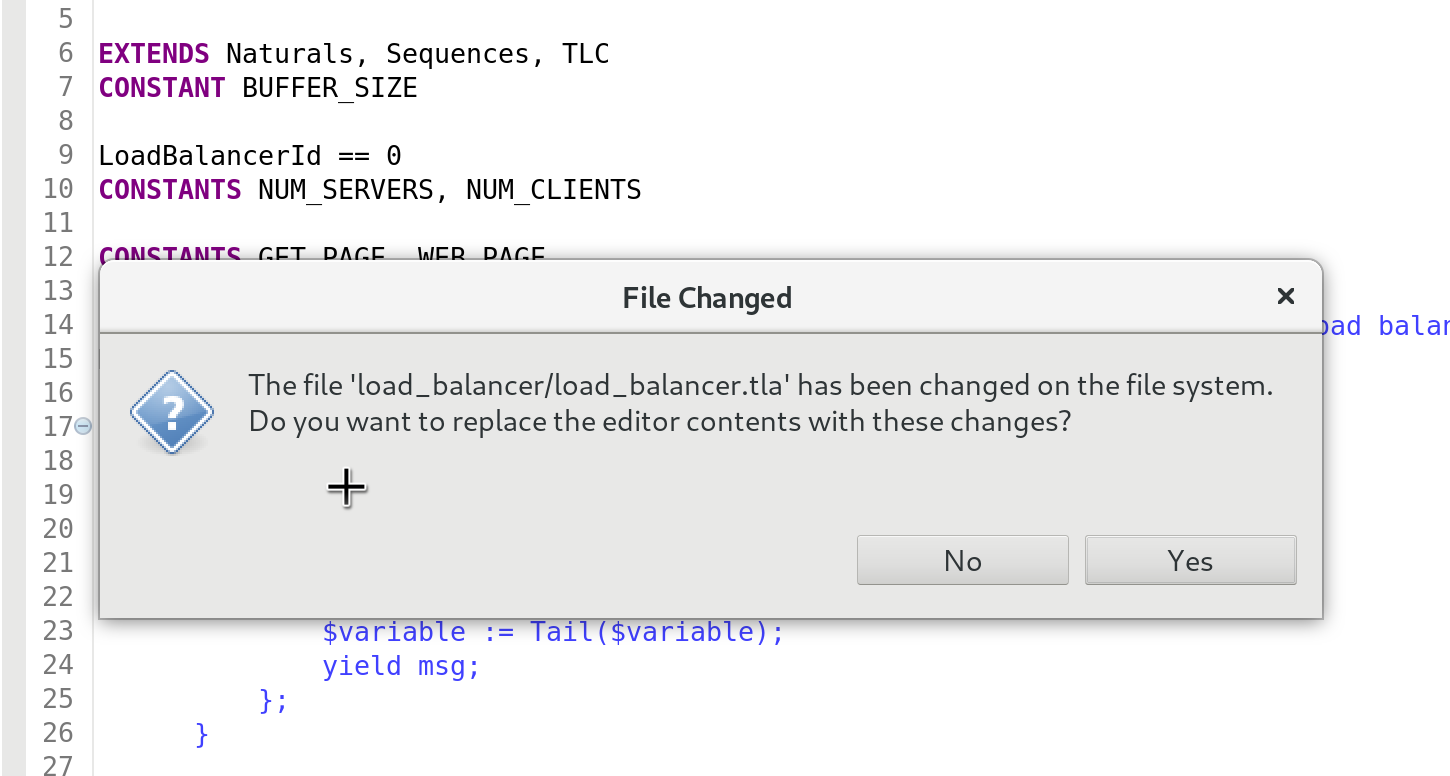
-
Press
Ctrl-tto recompile to TLA+. -
Open the created model and run it.
Run TLC on the model...TLC shows that invariant BuffersOk is violated.
Violation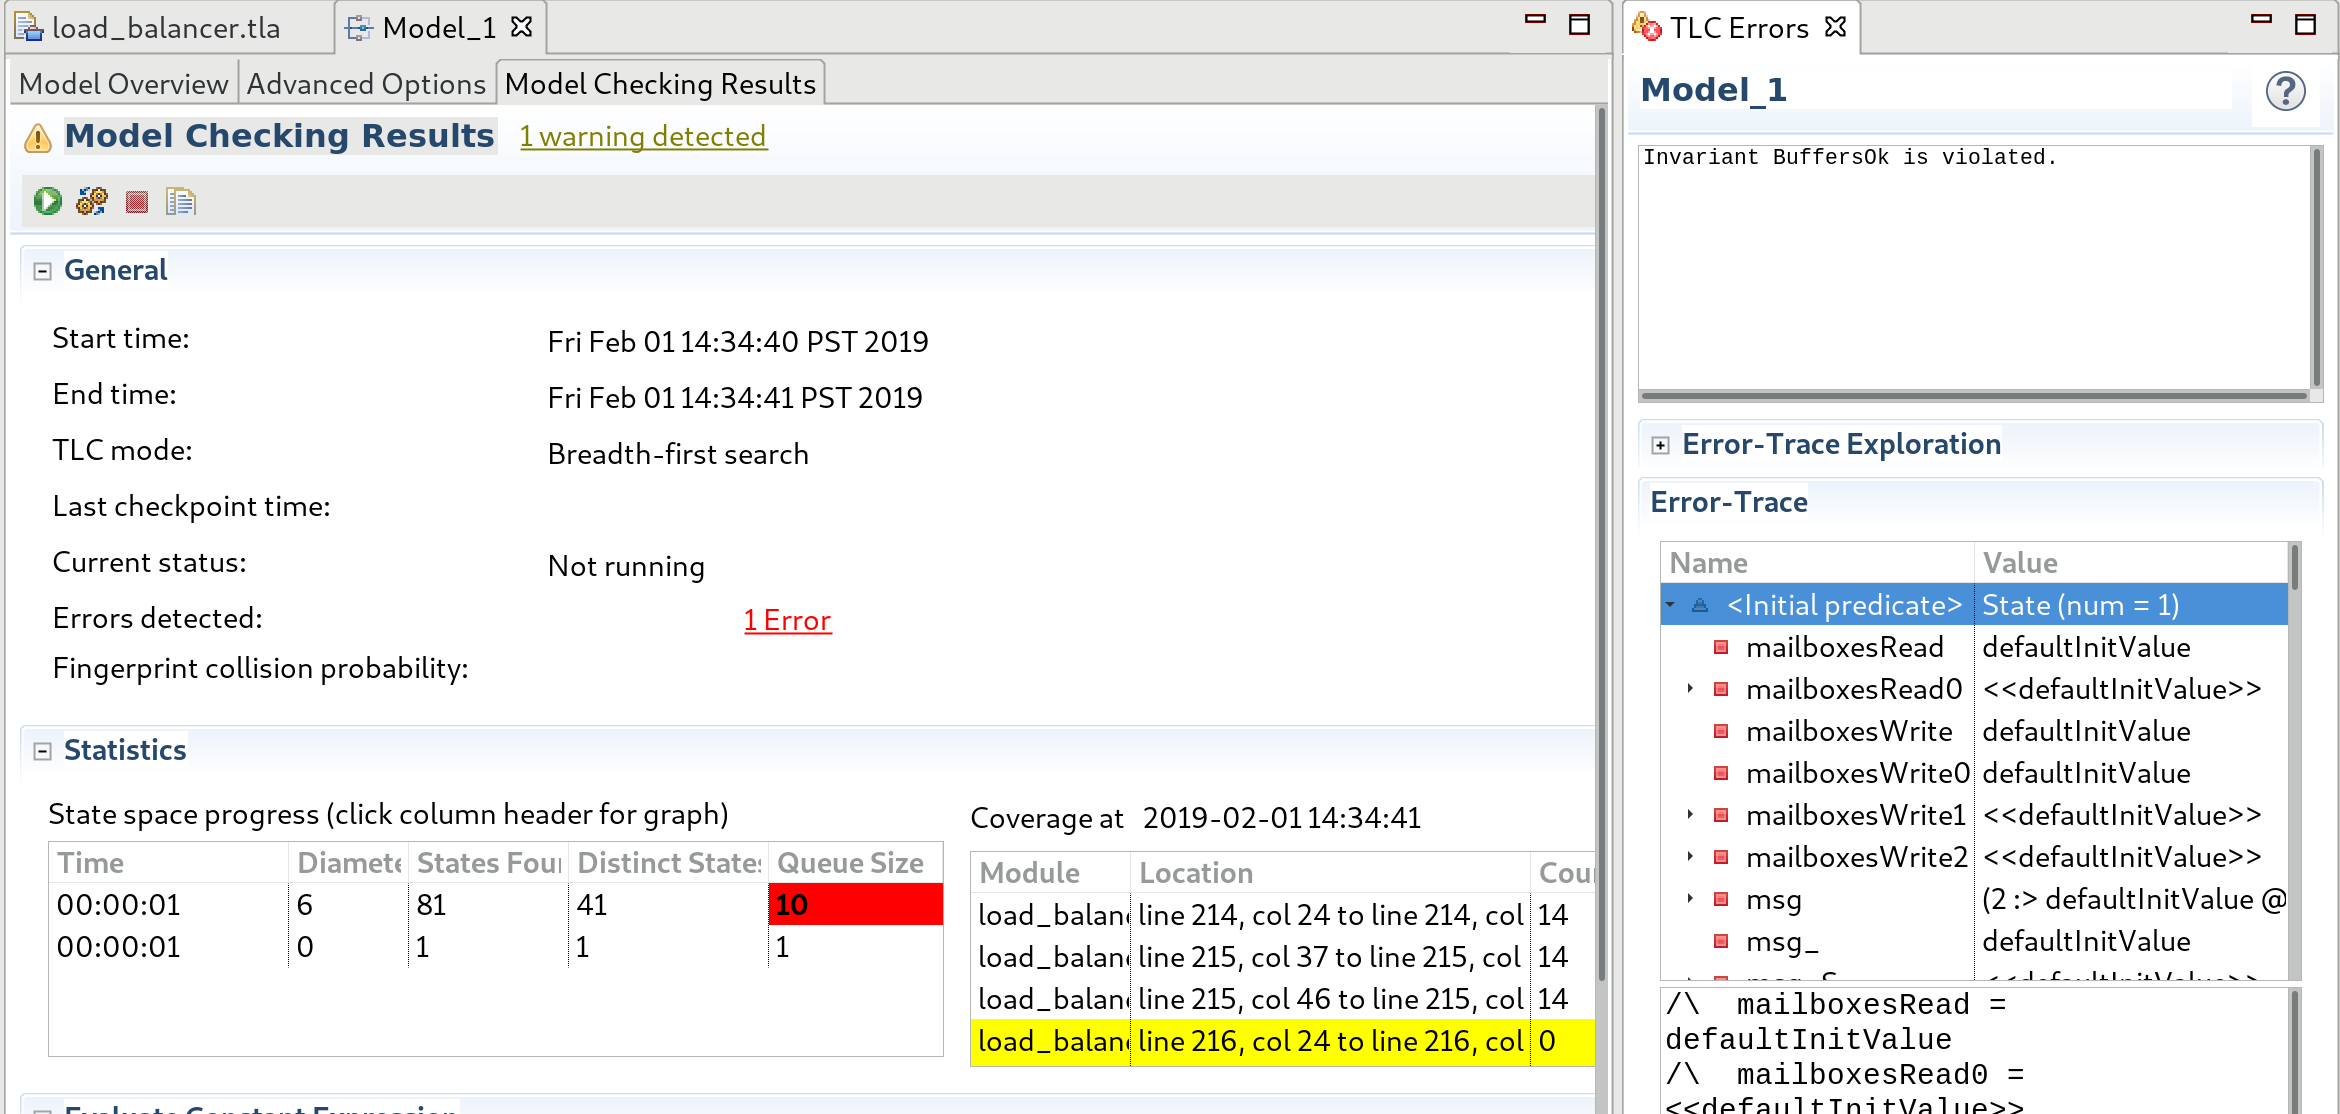
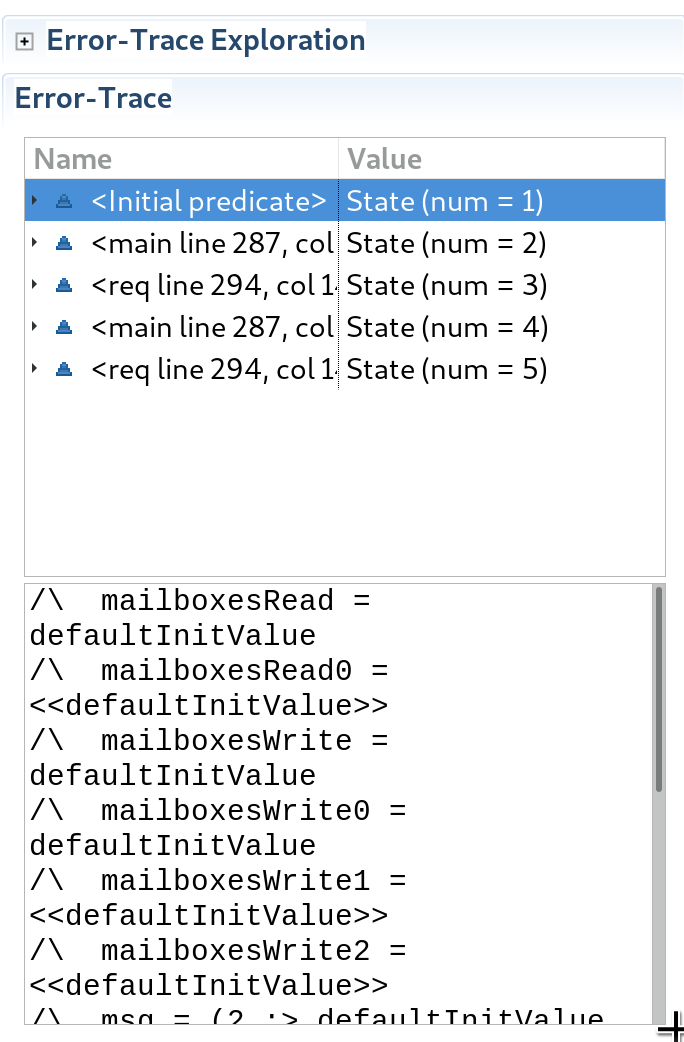
The Error-Trace pane shows how BuffersOk is violated. In this case, the client sent two messages to the server, which overflows the network buffer of size one.
Error trace